Impress your friends this Halloween by creating your own prosthetics. A mixture of liquid latex and oatmeal can be turned into an infected wound for a gruesome zombie costume. Try using eyelash glue to create extra scarring.
With a quick trip to the Halloween store and a little searching through your kitchen, you likely will have everything you need for this project. Dollar stores, drug stores, and Value Village are also good options for extras like face paints, blood, and costume supplies. For those who are allergic to latex, try researching alternatives like silicone or gelatin products.

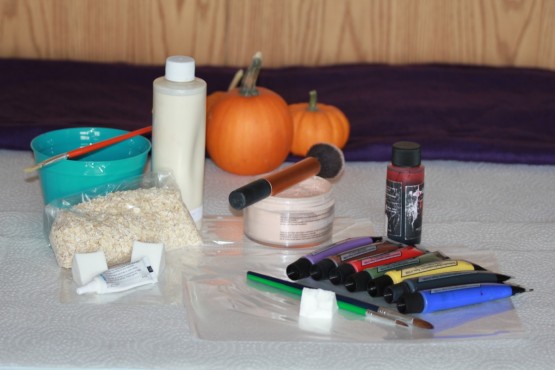
What you will need
Clear liquid latex
Sheet protector
Oatmeal (uncooked)
Small mixing container
Cheap art brushes
Powder (cosmetic or talcum)
Sponges
Face paints
Eyelash glue
Fake blood
Latex cautions: Test a patch on your arm if you’re unsure whether you are allergic (most eyelash glue contains latex). Keep away from eyes and hair—it has been known to remove eyebrows. Use only inexpensive or disposable tools, as it will destroy brushes and sponges. Latex sticks to itself—powder will stop this from happening. Make prosthetics ahead of time: they will need 8-10 hours to dry.
Creating the Prosthetic
Step 1: Prep work station
Cover work area (surface and floor) with paper towels or old newspapers. Grab latex, oatmeal, mixing container and a brush. Lay down sheet protector. Sanitize plastic sheet and tools with rubbing alcohol, especially if making prosthetics for others.
Step 2: Create mixture
Add a small amount of liquid latex to the bottom of mixing container (roughly 2-5 tbsp., depending on the size of the piece). Add oatmeal until a chunky, but slightly liquid, consistency is reached. Dilute with latex if too thick. Mix enough for one piece at a time—latex thickens as soon as it hits the air.
Step 3: Mold prosthetic
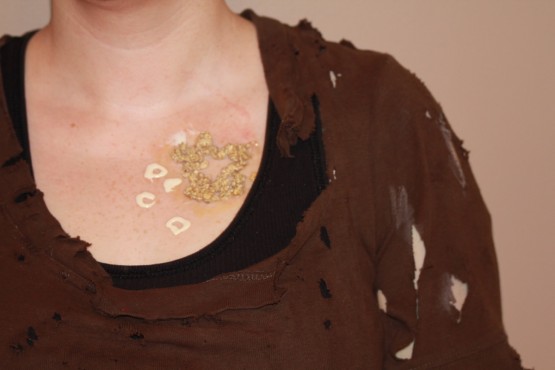
Pour mixture onto sheet protector. Push oats around with a brush to create jagged edges and a hole in the middle. Pour a small blob of latex somewhere else on the sheet and use this to paint thin edges around the prosthetic (this will make it easier to apply and blend into the skin). Let prosthetic dry overnight.
Step 4: Remove prosthetic
Apply powder to the top. Slowly peel the piece up, adding powder underneath as you go.
Applying the prosthetic
Step 1: Prep skin
Clean skin with soap and water, oil-free makeup remover or witch hazel (latex applies best to clean, non-oily skin). Make sure skin is dry.
Step 2: Apply
Prosthetics apply best to flat, immovable areas (forehead, chest, etc). Paint a thin layer of latex where the piece is to be applied. Stick prosthetic to latex and ensure all of the edges are down (use extra latex underneath edges if necessary). Allow piece to dry for several minutes (or use hair drier). Paint a thin layer of latex on top of the tapered edges to further blend the prosthetic into the skin. Add powder after allowing the latex to dry.
Creating your Costume
Step 1: Go nuts!
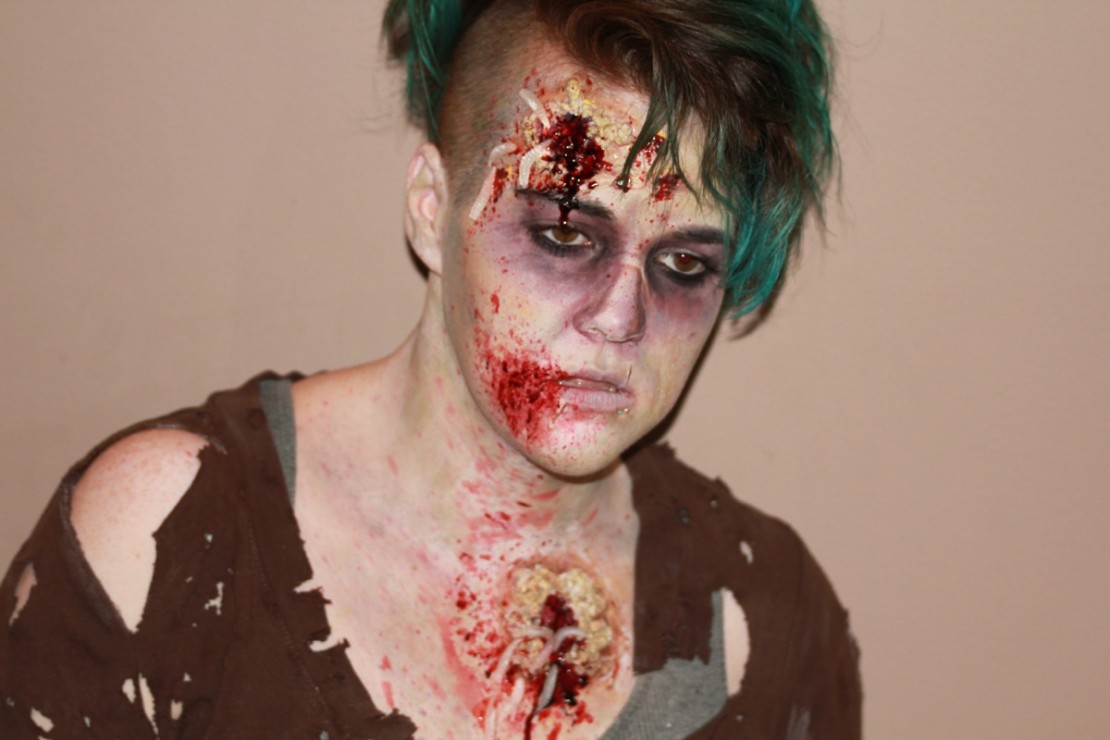
Mix colours to create sunken eyes (black, purple, blue, red) and dead skin (white, black, blue, green, yellow). Create blood splatter by thinning down some red face paint (or fake blood) and flicking it on with a brush (most dollar store paints/bloods can be easily thinned with water). Add extra scarring by drawing on shapes with eyelash glue. Create depth by outlining wounds with brown or black and filling the inside with dark purples and reds. Use yellows and greens to make wounds look infected. Add liberal amounts of thick, fake blood. Stick on some creepy crawlies with a bit of liquid latex. Distress an old t-shirt with some scissors and a coarse nail file (or sandpaper).
Cleanup
Carefully peel off the prosthetics (they can be reused). Any kind of cooking oil can be used to clean up remaining latex. Use a baby wipe to remove fake blood and face paints. Moisturize your skin!


